I used to pack four sets of D batteries for a three-night trip. Not because I wanted to -- because I had been burned enough times by a lantern that gave out at 10pm, leaving me to find my headlamp in the dark by feel. Then a buddy showed up to camp with a rechargeable LED lantern he had charged in the car on the drive up. We used his lantern the whole weekend. He never touched a battery. I bought the Lepro LED camping lantern the week I got home, and I have not bought a single D battery for camp lighting since.
The problem is not really the batteries. The problem is the whole system around them: buying them before every trip, running out mid-weekend, dealing with corroded contacts the following season, and still getting uneven light that dims as the cells drain. A rechargeable lantern fixes all of that at once, but only if you set up your campsite lighting intentionally. Here is the exact process I follow, from charging at home to placing the lantern on-site, so your camp stays lit all night without scrambling for power.
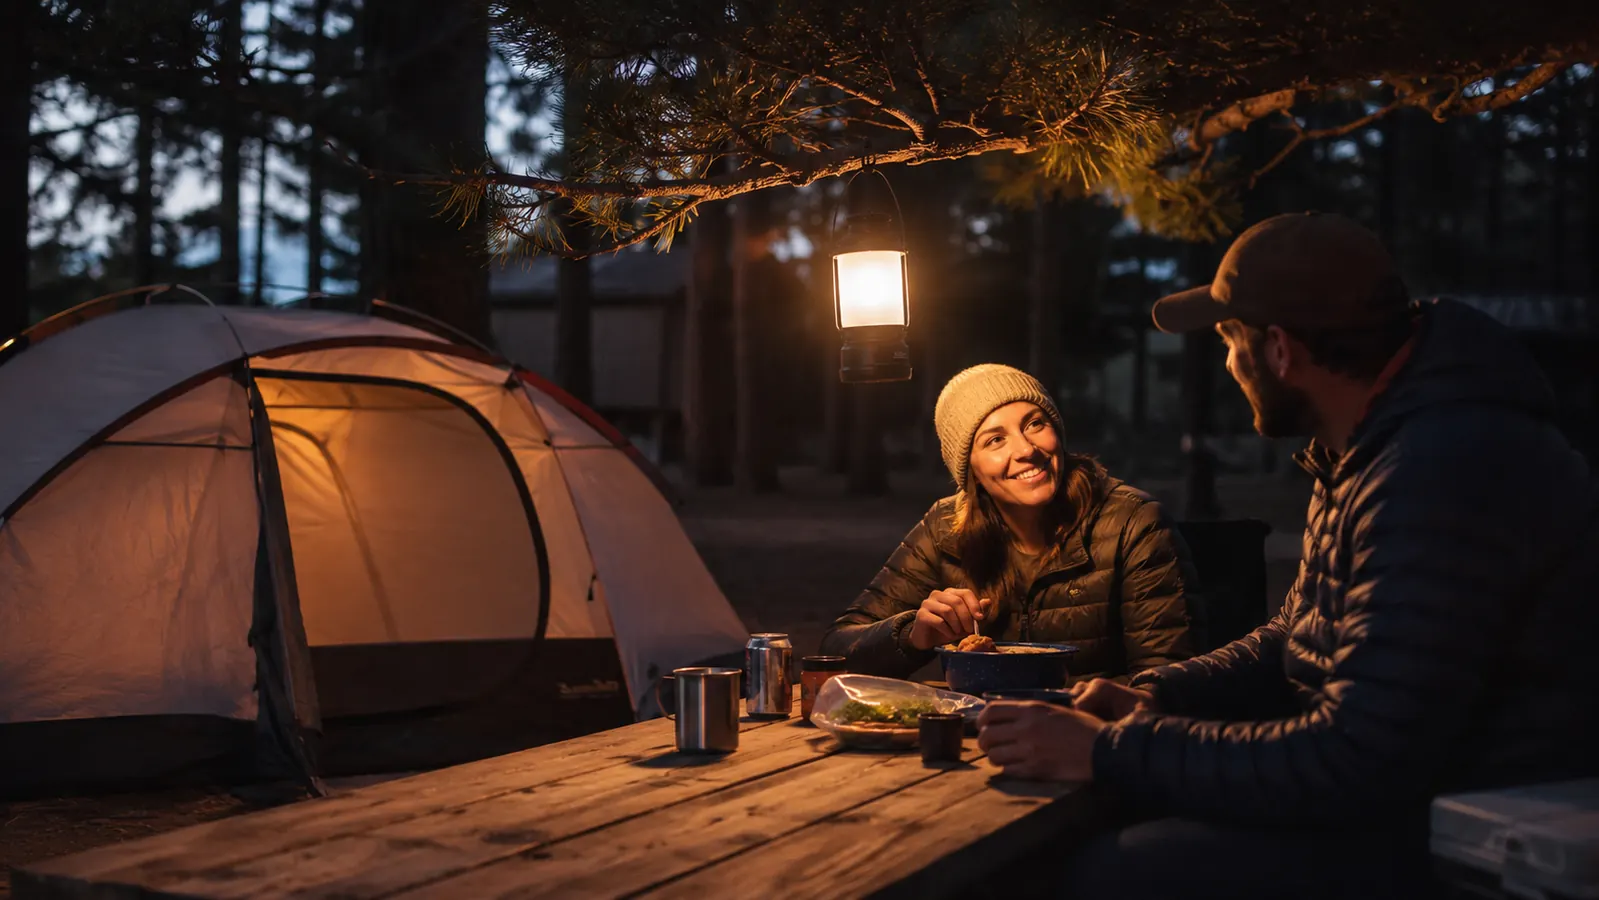
Tired of D-battery roulette every time you camp?
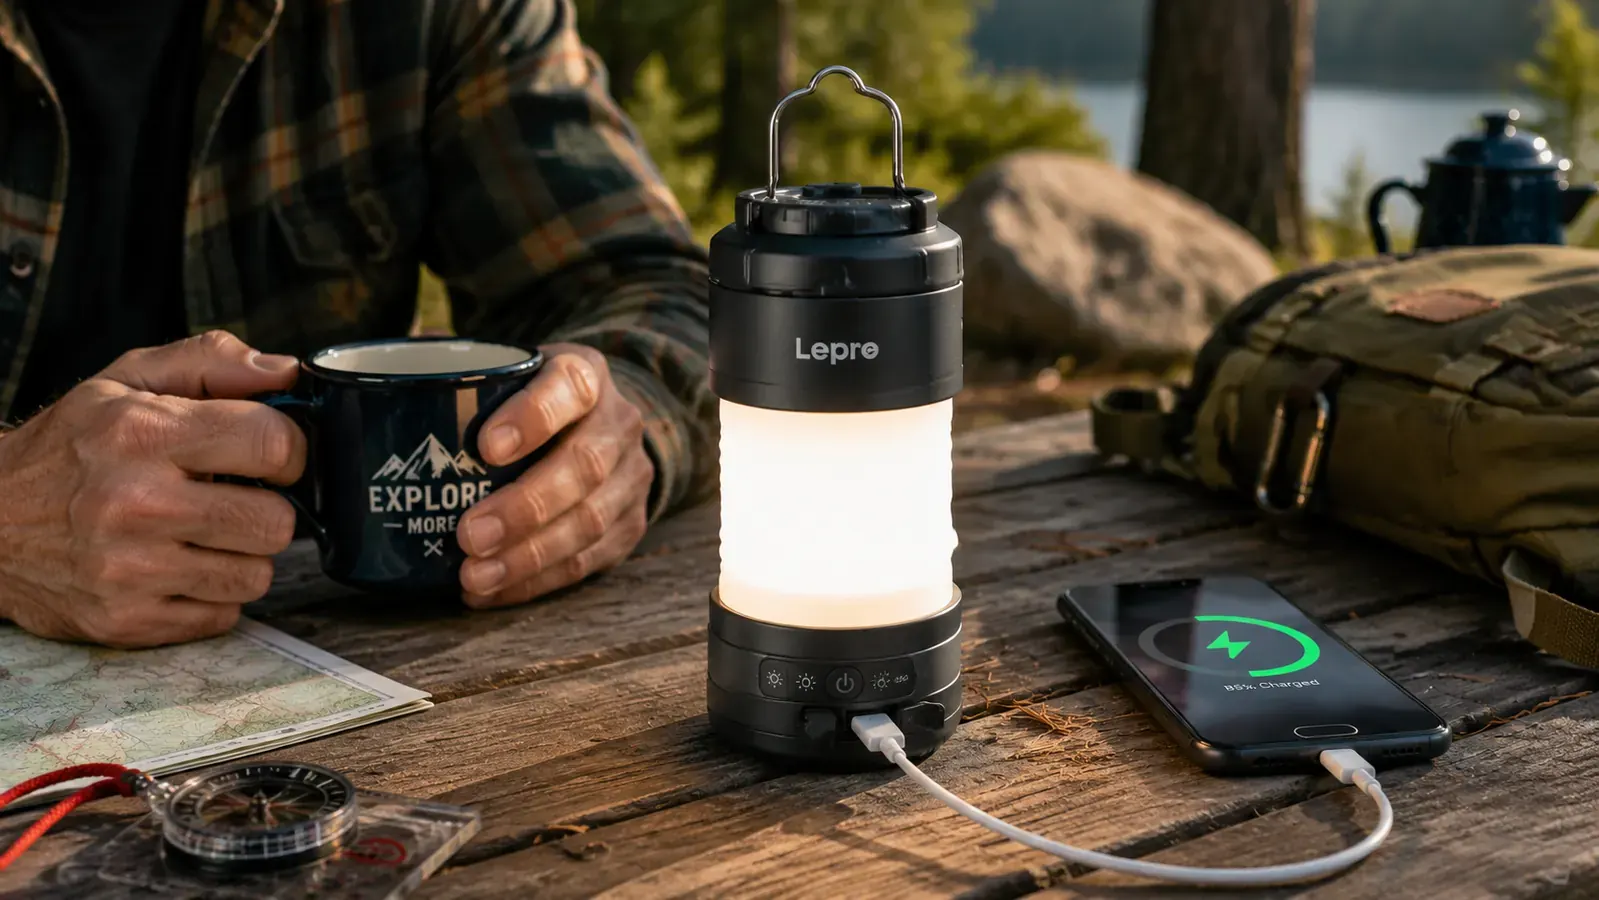
The Lepro 1000LM Rechargeable Camping Lantern has a 4400mAh battery, four light modes, and a built-in USB output so it can charge your phone while it lights your site. I have run it through a full camping season and it has never let me down. Check the current price on Amazon before you head out.
Amazon Check Today's Price on Amazon -> →Step 1: Charge the Lantern Fully Before You Leave Home
This sounds obvious, but most people skip it or do a half-charge the morning of the trip. The Lepro's 4400mAh battery takes about four to five hours to go from empty to full. If you leave home with 60 percent, you might make it through Friday night fine, but Saturday evening you are guessing. Plug it in the night before, not the morning of.
I also use the drive time to charge a backup: a 10,000mAh USB power bank that lives in my camp box year-round. The Lepro charges via USB, so this power bank acts as a secondary fuel source if I need a mid-trip top-up. Between the internal battery and the power bank, I have roughly 30 hours of runtime on medium brightness for a single lantern. For a three-night trip, that is plenty with room to spare.
One more thing before you leave: check that the USB cable is in your kit. The Lepro ships with a charging cable but it is short. I keep a longer USB cable in my camp box specifically for this lantern so I am not hunching over a car outlet. Small thing, but you will be glad you have it.
Step 2: Scout Your Site Before Dark
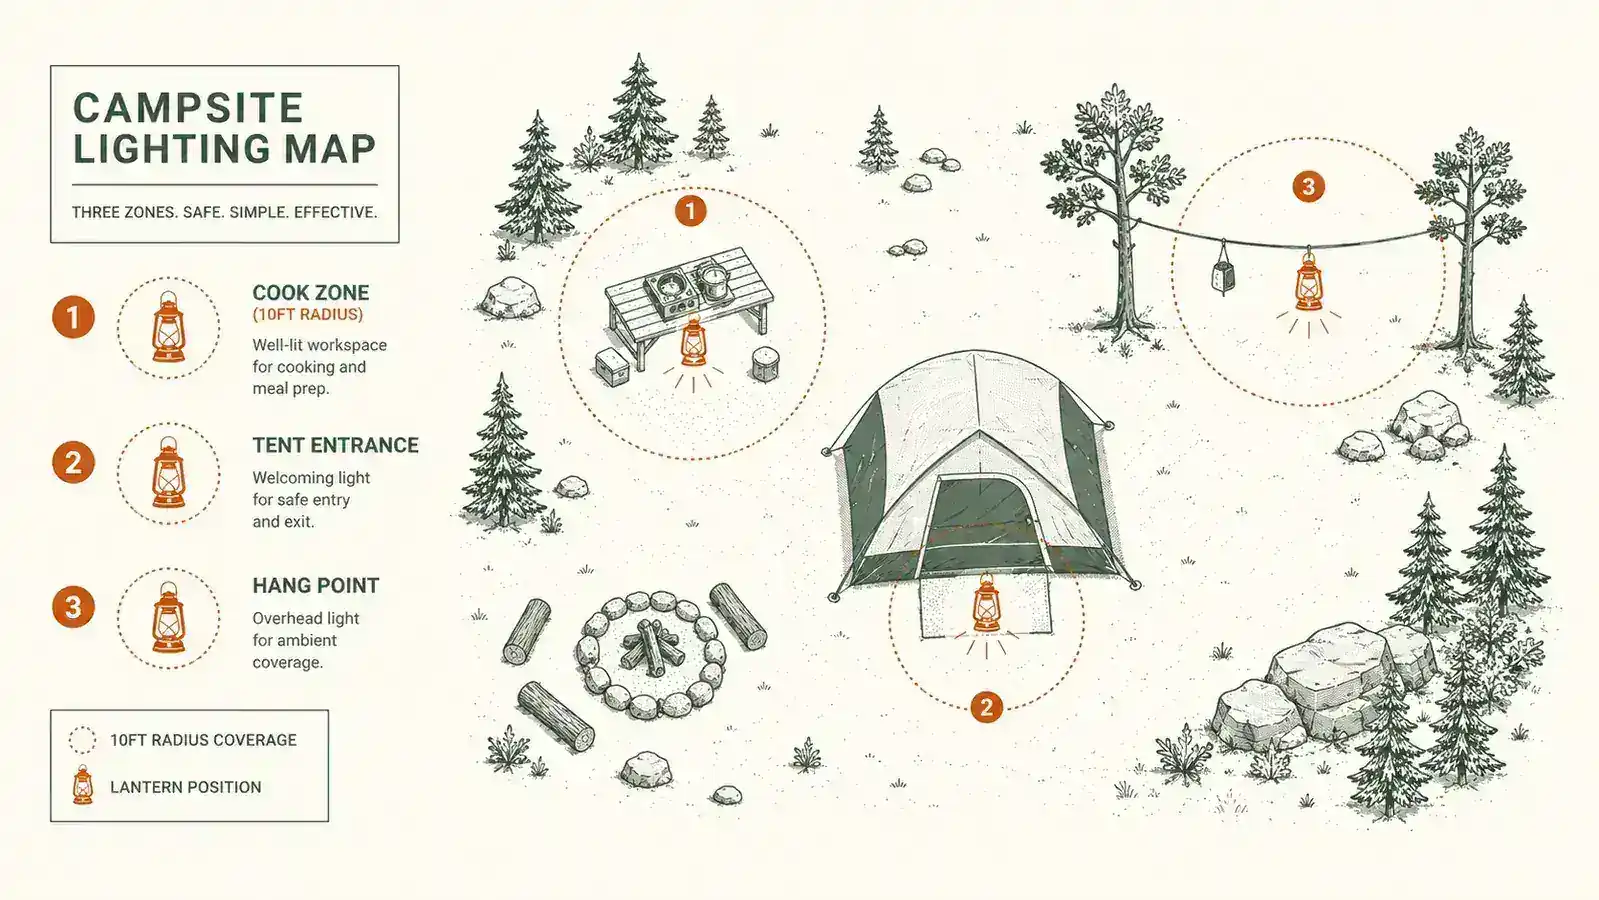
When you arrive at your campsite, walk it in daylight with the intention of planning where the light needs to go after dark. Most campers drop a single lantern in the middle of the table and call it done. That works, but you can do a lot better with the same single lantern if you think about where your activity zones are.
The three spots that actually matter are: the cook area, the seating circle, and the path between the tent door and wherever the rest of the camp is. The tent door path is the one people most consistently underestimate. You will walk it a dozen times after dark, and if there is no light there, you will trip over a stake or a cooler at some point. On sites with a fire ring, the fire itself handles seating light reasonably well, which means you can put the lantern over the cook station and use the fire for the rest.
Note what you have to hang from: tree branches, picnic table umbrella holes, tent poles, a rope strung between trees. All of these change where the lantern light falls and how wide the coverage is. A lantern on a table gives a pool of light roughly eight feet in diameter. A lantern hung four feet above the table spreads light over a much wider area and eliminates the harsh shadow the table itself casts.
Step 3: String a Ridgeline for Overhead Hang
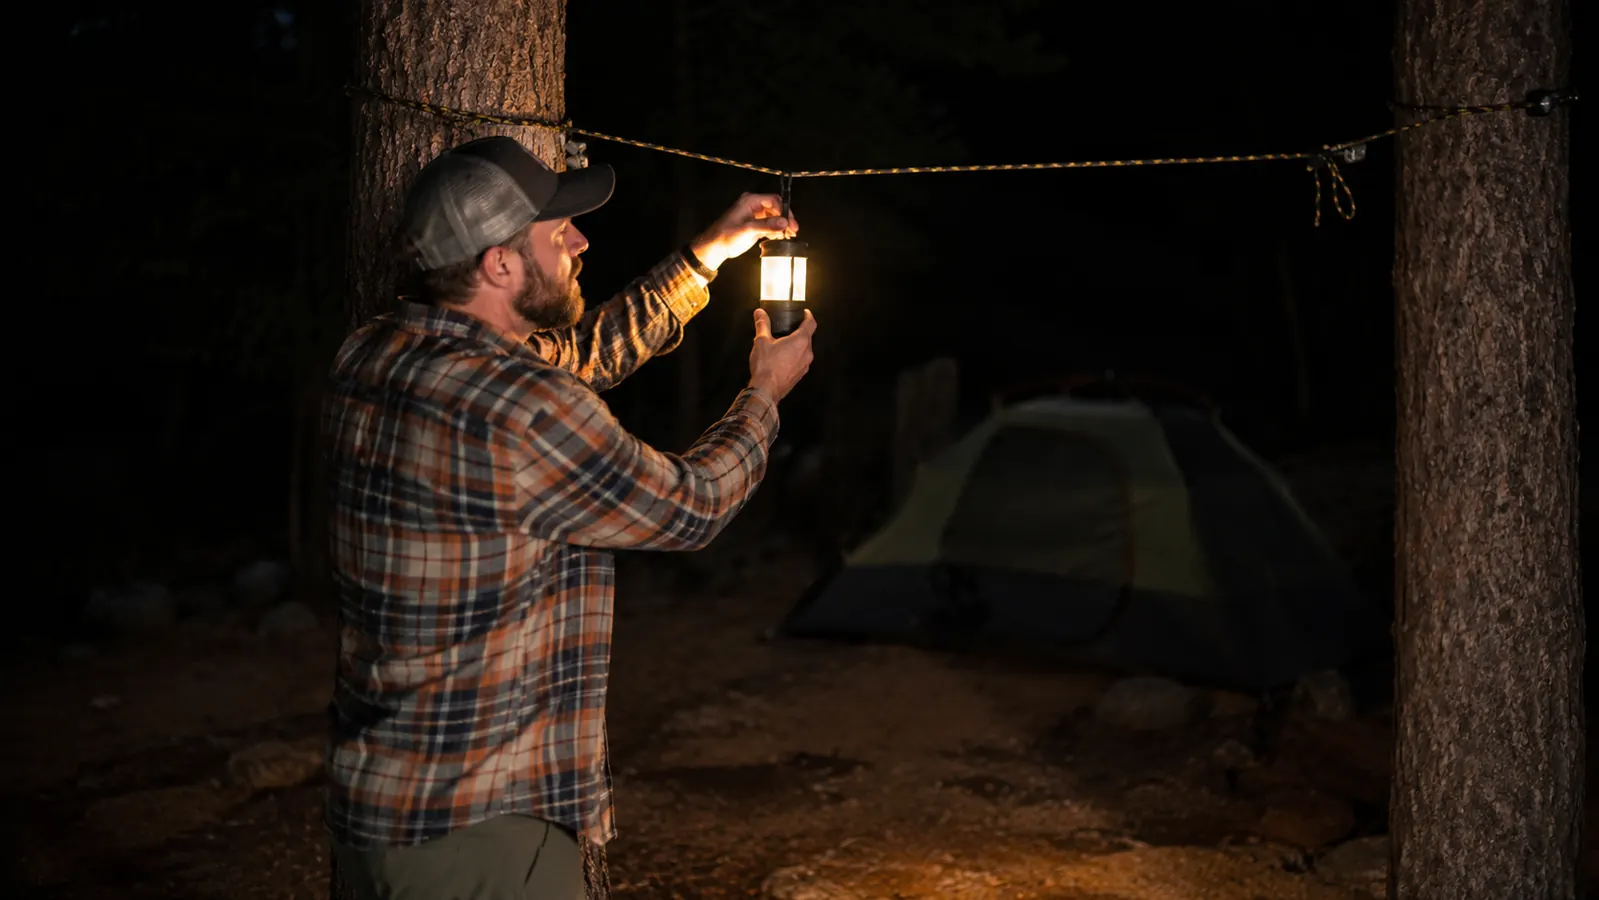
This step changed how my campsites look and feel more than almost anything else. Take 30 feet of paracord and string it between two trees at about eight to ten feet high, tying off with a simple taut-line hitch on each end. That ridgeline becomes your lighting infrastructure for the whole trip.
The Lepro lantern has a built-in hanging hook at the top. Clip a small carabiner to that hook, clip the carabiner over the ridgeline, and slide it to wherever you want overhead coverage. You can move it in about three seconds. Cook dinner with it over the stove. Move it to the seating area for card games. Move it back to the table when you are cleaning up. This flexibility is what a table lantern sitting in one spot cannot match.
If you do not have trees close enough, a trekking pole with a hook works. So does a dedicated camp lighting pole if you bring one. The point is getting the light source above your head rather than at table height. Overhead light covers more ground, reduces glare, and makes the campsite feel open instead of dim.
Step 4: Set the Right Brightness Mode for Each Situation
The Lepro has four modes: high (1000 lumens), medium, low, and a warm candlelight flicker mode. Using high brightness all the time is the fastest way to drain the battery, and it is usually more light than you actually need. Here is how I match the mode to the task.
High mode is for setup: when you arrive at dusk and need to see clearly to pitch the tent, set up the kitchen, and get organized. Once camp is set and you are in hang-out mode, drop to medium. Medium brightness on the Lepro lights a standard campsite table and the area around it well enough to cook, eat, and play cards without straining. Low mode works for late evening when a few people have gone to bed and you want ambient light without blasting your neighbors or burning unnecessary battery. The candlelight flicker mode is honestly just nice -- I use it as a dinner table centerpiece when my kids are with me. It does not do much for task lighting but it sets a good mood around the fire.
Battery life on each mode, from my own field timing: high gives roughly four to five hours, medium gives eight to ten hours, and low gives upward of twenty hours. For a typical evening from 8pm to midnight on medium, you are using about half the battery per night. A full charge covers two full evenings with light to spare, or three evenings if you run low for part of the night.
Once I started hanging the lantern instead of setting it on the table, the whole campsite felt different. More light, less glare, and I stopped knocking it over.
Step 5: Place a Second Light Source Inside the Tent
Your main camp lantern is handling the exterior. Inside the tent is a different problem. A bright lantern on medium brightness inside a small two-person tent is too much light to sleep near, and the glare reflects off the tent fabric in an unpleasant way. This is where a headlamp or a small clip-on light earns its keep.
I keep a compact headlamp inside my sleeping bag stuff-sack. When I come in from the campfire, I use it at low brightness to see well enough to change and get situated without waking anyone else in the tent. Most headlamps have a red-light mode that is even better for this: it does not kill your night vision and it does not light up the tent like a spotlight. If you have kids who want a little ambient light in the tent, a small battery-powered fairy light string takes up no space and runs for days on a couple of AA batteries.
The Lepro lantern's diffused shade also means it works reasonably well inside a larger tent or a screen shelter if you do need one general-purpose light source for a group. Set it in the center of the tent floor on low and it gives enough ambient light to navigate without being harsh. Just do not leave it running all night inside an enclosed tent -- not for safety reasons with an LED, but because you will drain the battery and wake up to a dark camp.
What Else Helps
A few supporting habits that make campsite lighting work better, regardless of which lantern you use.
Reflective gear placement matters more than people expect. A white or silver camp towel hung on the side of the cook station reflects lantern light back into the work area and effectively doubles the useful brightness without touching the lantern settings. Same idea applies to using the inside surface of a cooler lid or a light-colored tablecloth as a reflector.
Keep the charging cable accessible in your camp kitchen box, not buried at the bottom of a bag. If you want to top up the lantern mid-trip using your car or a portable power bank, you want to be able to grab the cable in ten seconds. The Lepro also has a USB-A output port that can charge a phone, which means the lantern doubles as a camp phone charger during the day when you do not need light. I plug my phone into it during lunch and arrive at dinner with a full phone battery.
Finally, bring a small clip-type hook or two in your camp kit. They cost almost nothing and they let you hang the lantern from spots that do not have a natural anchor: a tent pole grommet, a gear hook on a car window frame, the handle of a cooler. The more places you can hang the lantern, the more useful the ridgeline becomes when you do not have trees to work with.
If you want to go deeper on the Lepro itself -- how it performed through a full camping season, real battery life data, and where it falls short -- I wrote a full review: the Lepro Camping Lantern long-term review covers all of that. And if you are still on the fence about switching from disposable batteries entirely, the piece on 10 reasons to switch to a rechargeable camping lantern lays out the case in plain terms.
The right lantern makes all five of these steps easy
The Lepro 1000LM Rechargeable Camping Lantern is the tool that holds this whole system together. A 4400mAh internal battery, four brightness modes, an overhead hang hook, and USB charging out so it doubles as a power source for your phone. It is what I reach for first when packing for every trip. Check the current price on Amazon before your next trip.
Amazon Check Today's Price on Amazon -> →