I have been car camping for about twelve years, mostly weekend trips with my wife and two kids to state parks in Georgia and North Carolina. For the first four or five of those years, I always came home Sunday with a stiff lower back and sore shoulders. I blamed the sleeping bag, then the tent pad, then the drive home. It took me embarrassingly long to figure out that the real problem was how I was sitting for six to eight hours each day at camp, which is most of a camping day if you think about it. The Coleman Portable Camping Chair with its built-in cooler and side table was the piece of gear that finally changed that for me, but the chair was only part of the fix. The bigger part was learning how to set up and use my seating area correctly. This guide covers both.
If you finish a camping weekend feeling worse than when you left, I want to show you exactly how to change that. These five steps take about twenty minutes to implement on arrival and pay off the whole weekend.
Still sitting in a flimsy fold-up with no armrests? Your back is paying the price.
The Coleman Portable Camping Chair has 60,000-plus reviews and a 4.7-star rating for a reason. Built-in cup holder, padded seat and back, and a side table that actually holds your stuff. Check today's price and see why it is the most copied camp chair design on the market.
Amazon Check Today's Price on Amazon →Step 1: Choose a Chair With Back Support, Not Just a Seat
Most people grab whatever fold-up chair is cheapest and wonder why they feel wrecked by Saturday afternoon. A camp chair does more postural work than your living room couch because you are sitting on uneven ground with no armrests at desk height, no lumbar cushion, and no footrest. You are essentially fighting gravity for hours without support. The first thing to get right is the chair itself.
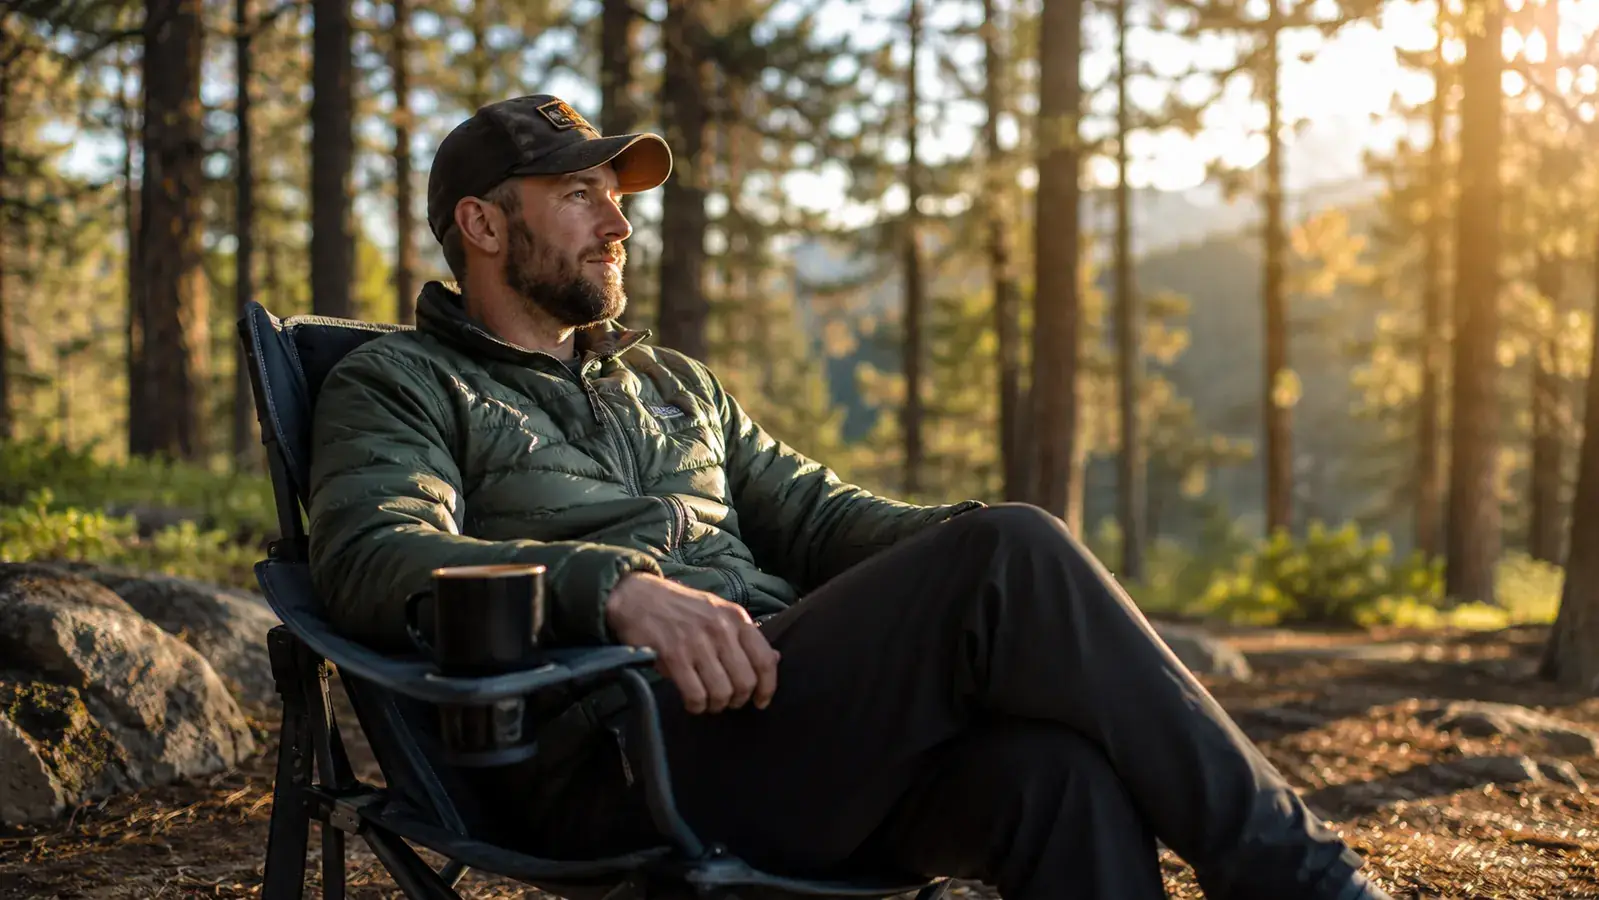
What I look for in a chair that actually supports me: a tall padded back that reaches my shoulder blades, wide flat armrests I can actually rest both arms on, and a seat height that lets my feet rest flat on the ground. The Coleman chair hits all three. The padded back is tall enough to reach my mid-back at 5'11", the armrests are solid and wide, and the seat sits at roughly 18 inches off the ground, which works for most adults without letting your knees climb up past your hips. That hip-to-knee angle is what matters most for lower back comfort over multiple hours.
If you are 6'3" or taller, or if you have knee issues, look for a model with a higher seat or adjustable legs. But for the average adult, the Coleman dimensions are spot on. I have put three of these chairs through three full camping seasons, used them on gravel, grass, pine needle beds, and a few very muddy sites after heavy rain. The frame has not bent, the fabric has not torn, and the cup holder has never failed to hold a full Hydro Flask. That is the baseline you want before anything else in this guide matters.

Step 2: Level Your Spot Before You Open the Chair
This is the step most people skip and the one that causes the most back pain over a full weekend. Even a two-inch slope puts your pelvis in a slight tilt for every hour you sit on it. Do it for eight hours across two days and your lower back is going to complain regardless of how good your chair is.
When you arrive at your site, walk the area where you plan to set chairs and find the flattest patch of ground. This is usually not the first obvious spot right next to the fire ring. It is often three or four feet off to the side. If there is a slope, position your chair so the back legs are slightly uphill rather than downhill. Downhill placement tips your weight forward onto your thighs and pulls your lower back into flexion. Uphill placement keeps the seat level or very slightly reclined, which is the natural rest position for your lumbar spine.
On particularly uneven sites, I carry two thin squares of closed-cell foam about 12 inches square and half an inch thick. They weigh nothing, fit in a corner of the truck bed, and can shim a chair leg by just enough to fix a tilted seat. This sounds overly fussy but after the first time you try it on a bad site you will never leave home without them.
Even a two-inch slope in your chair position puts your pelvis in a tilt for every hour you sit. Level your spot first and your back will thank you by Sunday.
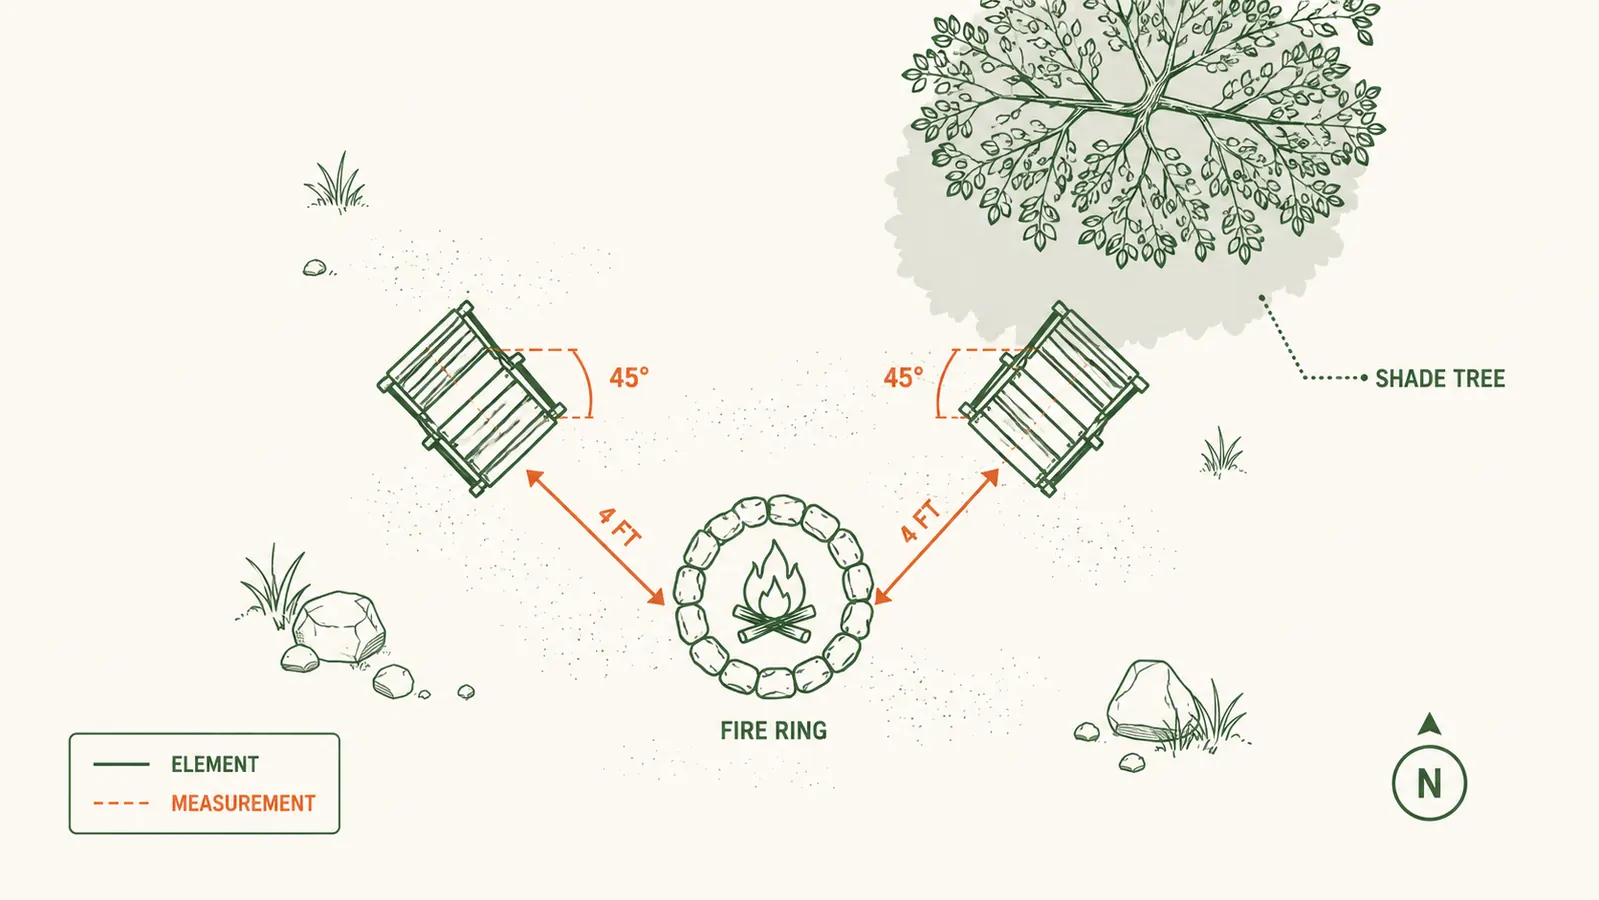
Step 3: Set the Seating Circle Relative to the Fire and Sun
Where your chairs point matters more than it sounds. Most people set camp chairs in a ring around the fire and call it done. But if the fire is directly in front of you on a hot day, you are leaning back and craning your neck to talk to people across the ring. If the sun is hitting you from the side all afternoon, you are twisting your torso and neck to avoid it. Both positions fatigue your neck and upper back faster than almost anything else.
Instead, angle chairs at about 45 degrees to the fire rather than pointing straight at it. This opens up the social circle so you can see everyone without turning your head constantly, and lets you glance at the fire without staring directly into it. Position the chairs so the sun is behind you or off the back quarter during your peak sitting hours, typically 2 pm to 6 pm. If you have a natural shade feature like a large tree or an awning on your shelter, build the seating area under it and let the fire sit just outside the shade line. You get warmth without direct heat and shade without darkness.
The Coleman chair's built-in side table is useful here because it eliminates one of the main reasons people twist out of good posture: reaching for their drink. With a can or bottle in the cup holder at arm level and snacks or a phone on the side table, there is nothing pulling you sideways out of a neutral seated position.

Step 4: Use the Built-In Features So You Are Not Reaching or Twisting
This sounds obvious but most people set up a camp chair correctly and then immediately undermine it by putting their cooler behind them, their phone on the ground three feet away, or their snack bag hanging from a tree branch they have to stand up to reach. Every unnecessary stand-and-reach and every backward twist adds up over a weekend.
The Coleman chair has a 4-can cooler built into the right armrest. I keep cold drinks in there for the first two to three hours of each sitting session. That alone eliminates probably a dozen trips to the main cooler each day. The side table on the left arm holds my sunscreen, a granola bar, and my phone face-down. Everything I need for an hour of comfortable sitting is within arm's reach without twisting. When I do need something from the main cooler or the camp kitchen area, I stand up, walk to it, and walk back rather than reaching or shuffling the chair.
If you have kids or pets at camp, set up a small folding table two to three feet in front of your seating area rather than at the side. It creates a natural reach zone that keeps you leaning slightly forward from the hips (a healthy sitting position) rather than twisting laterally. The kids use it too and you stop losing snacks to the ground.

Step 5: Build Movement Into Your Sitting Day
No chair, no matter how good, is comfortable for six unbroken hours. The human spine is not designed for static seating and neither is the hip flexor system. Even at home on your best ergonomic chair, you would get up and move around every hour or so. At camp the temptation is to park in a chair with a book or a beer and not move until dinner. That is exactly what causes the Sunday stiffness.
Set a loose timer or habit: every hour or whenever you finish a drink or snack, stand up, walk the perimeter of the campsite once, and do five to ten slow hip circles before sitting back down. This takes ninety seconds and is the single most effective thing I have done for camp comfort. When you stand up, plant the Coleman chair's legs firmly so it does not tip over on a slope. The wide four-leg base handles this well on most surfaces; on steep gravel sites I have used the foam shims from Step 2 to level it back out before sitting again.
In the evening when the day cools down, bring the chairs closer to the fire and lean back slightly more. The built-in cup holder keeps your evening drink stable even in the more reclined position. I have tested this with a full 20 oz mug at about 30 degrees of recline and it has not spilled once across three camping seasons. That matters more than it should at 10 pm by a fire.
What Else Helps
The five steps above cover the structural setup. A few accessories round out the system. A thin lumbar roll or rolled-up fleece jacket tucked behind your lower back adds meaningful support on day two when the chair padding has softened from use. A footrest, even a small cooler or a cut log at the right height, reduces the load on your thighs and takes pressure off your lower back. And if you camp in summer heat, position a battery-powered clip fan facing your seat from the table in front of you. Keeping your core temperature down keeps your muscles from tightening defensively, which is a real comfort factor that most camping advice ignores.
For families, buy enough chairs that everyone has their own correctly-fitted seat. Adults sharing or swapping chairs mid-day means someone is always in a wrong-height seat for their body. The Coleman chair is priced low enough that buying four for a family trip is practical. I bought our third one for our twelve-year-old, who had been using a child-sized chair that she had outgrown, and it eliminated the constant seat-swapping that had been a friction point every trip. You can read more on why the right chair matters so much in our breakdown of the 10 reasons a quality camping chair makes every trip better, and if you want a deeper look at the Coleman chair itself across three full seasons of testing, the long-term review covers every durability note and tradeoff.
The Coleman chair is the foundation this whole setup is built on.
With over 60,000 verified reviews, a padded back and seat, built-in 4-can cooler, and a side table that holds your phone and snacks, it is the one piece of camp furniture that does the most work. Check today's price on Amazon and see if it is still available in your color.
Amazon Check Today's Price on Amazon →